Everything WordPress

So, continuing our tutorial on Deploying a Wordpress site on AWS, we will now look at downloading Wordpress, moving Wordpress files to the correct folder, configuring a virtual host on Apache, and then setting up Wordpress.
First, SSH into your AWS EC2 instance if you are not inside.
Need help? Check our last tutorial — the second one.
When you get in, run the following command;
cd /tmp
The above command sends you the /tmp folder; we will download the WordPress file there, just like installing an application.
wget https://wordpress.org/latest.tar.gz
The command downloads WordPress files to your EC2 in a .tar.gz format, so we must extract the file first.
The command to that is below.
tar -xvf latest.tar.gz
The next step is to move the WordPress folder into the Apache directory, where your WordPress site will be served. The following command below will do that.
sudo mv wordpress/ /var/www/html
In a flash, the folder should move.
The next step is configuring the default virtual host file saved as 000-default.conf.
To do that, run the command below, which will open up the file using another inbuilt Nano editor.
sudo nano /etc/apache2/sites-available/000-default.conf
There, we can tell Apache the path to where our WordPress files are located so that it can serve it accordingly.
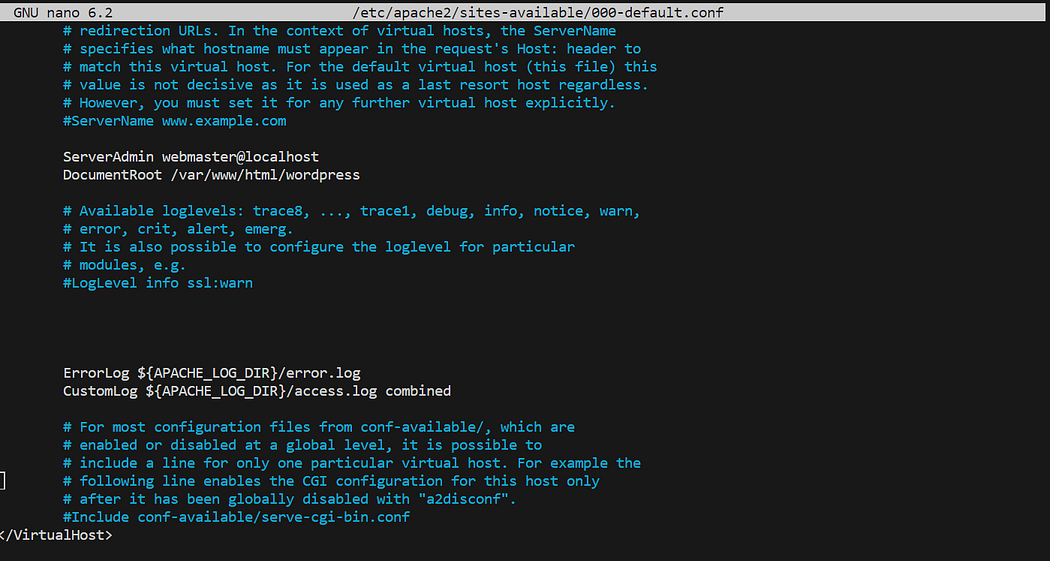
opening the 000-default virtual configuration file to set the WordPress path
Add “/wordpress” after “/var/www/html” like in the screenshot above.
Press CTRL + O to save and hit the “Enter” key when done. That’s how you save in the Nano editor. Press CTRL + X to exit Nano.
Now, access your site using your Elastic IP address. You can add “:80” after the IP address, but it is not compulsory as Apache knows to serve the files saved in the /var/www/html/wordpress directory.
The next step is to restart Apache, and you can do that by running the following command.
sudo systemctl restart apache2
After that line, visit your site using the Elastic IP IPv4 address from the first tutorial.
You should see the WordPress welcome screen, like the one below.
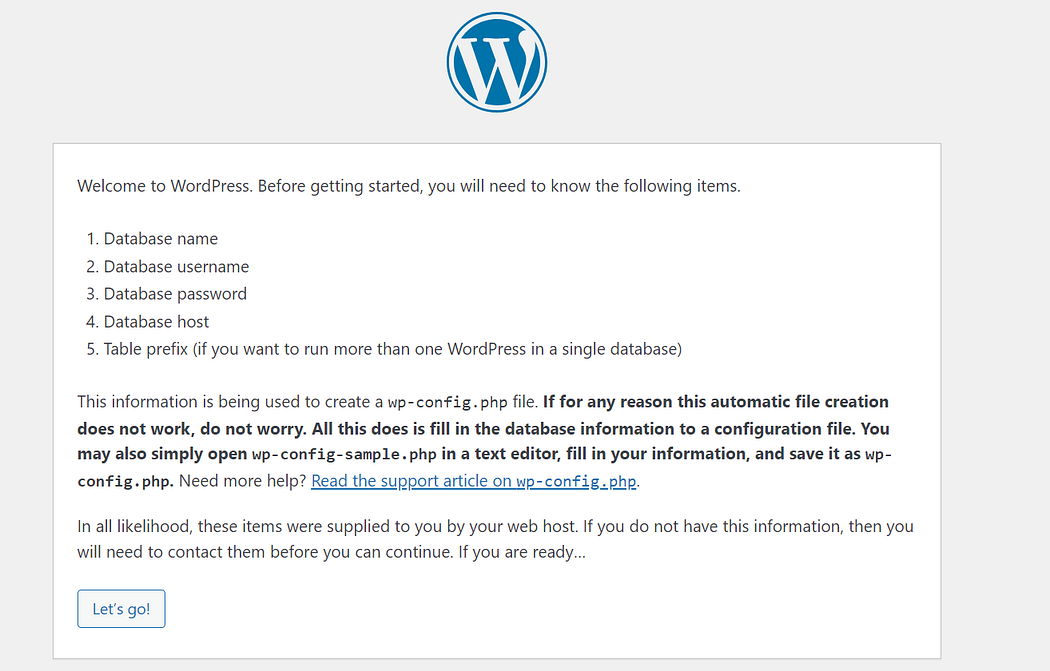
WordPress welcome screen
After you click “Let’s go!” you will be met with a screen like the one below.
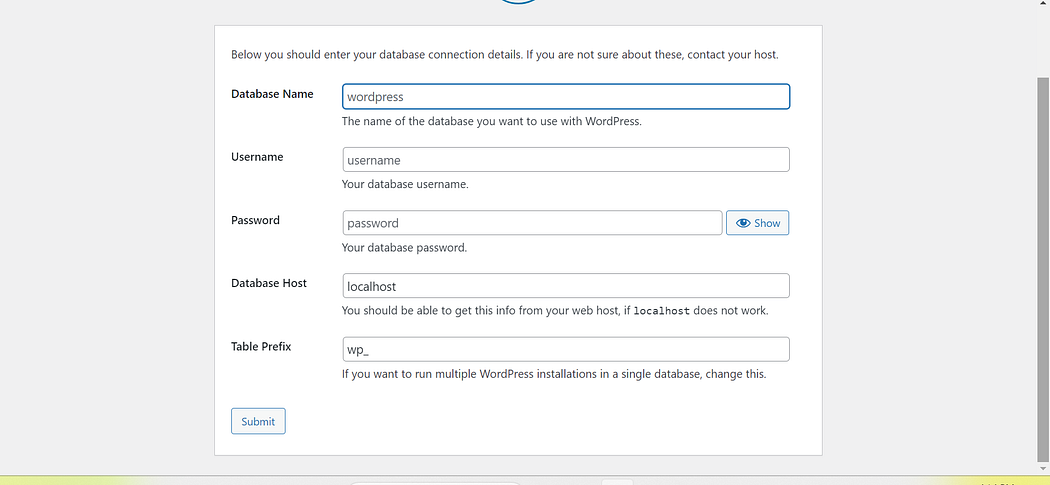
WordPress configuration screen
Now, to properly configure WordPress, you will need the following;
Database Name: You can get this from the MySQL database you created in the first tutorial. In the first tutorial, we created a database called “wp_db” in MySQL.
Username: You can get it from the user you created in the first tutorial. In our case, we created a “wp_demouser” user.
Password: This is the password you assigned to the MySQL user you created. In our case, “testpassword” is our password.
You can leave the Database Host and Table Prefix entries as default.
Without the quotes, of course.
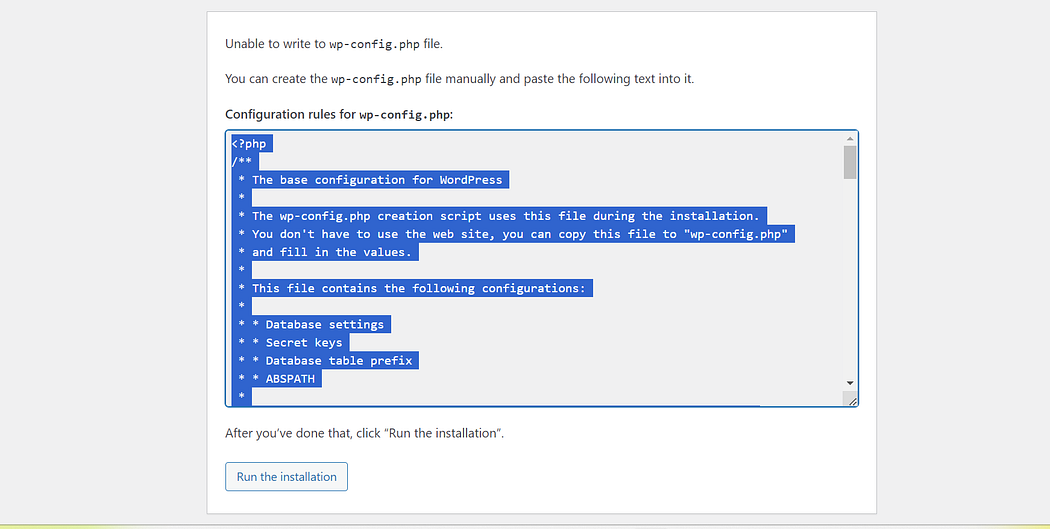
WordPress Wp-config content
After you have set that, you can proceed, but you will be met with a screen asking you to create the wp-config.php file, like the one above.
Back into your EC2 instance, run the following command;
sudo nano /var/www/html/wordpress/wp-config.php
When the Nano editor opens up, paste in the content from the screen that asked you to create the wp-config.php file.
Press CTRL + O and CTRL + X to save and exit the Nano editor.
Proceed with the installation.
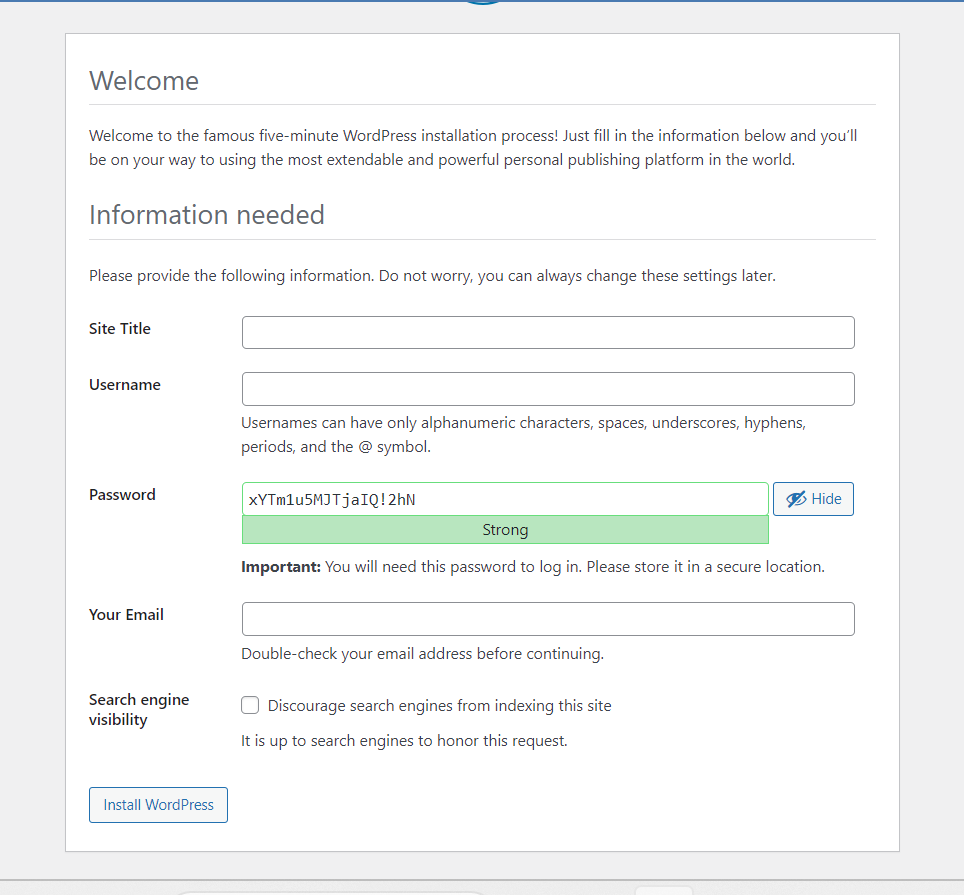
Setting WordPress username and password
Fill in the entries for the next screen and click on the “Install WordPress” button.
And voila, you have installed WordPress.
The next step is setting the proper permission for WordPress. That will be in another tutorial.
You can configure Certbot or use Cloudflare to proxy your domain name for SSL. That will also be in another tutorial.
Cheers!!!


